Hey there! So, you’re like me and don’t have a DVR, huh? But you still want to catch up on all those TV shows without missing a beat. I totally get it. I’ve been there, sitting on my couch, wishing I could just hit a button and save that amazing episode for later.
The frustration of missing out on key moments or entire episodes can be real. But here’s the good news: I went on a little adventure, diving deep into the world of TV recording without a DVR. And guess what? I stumbled upon some nifty methods and hacks.
From using alternative gadgets to exploring some underrated apps, I’ve tried them all. Stick around, and I’ll share with you how I manage to record TV shows without a DVR. Trust me, by the end of this, you’ll be wondering why you didn’t ditch that DVR sooner.
1. USB Stick
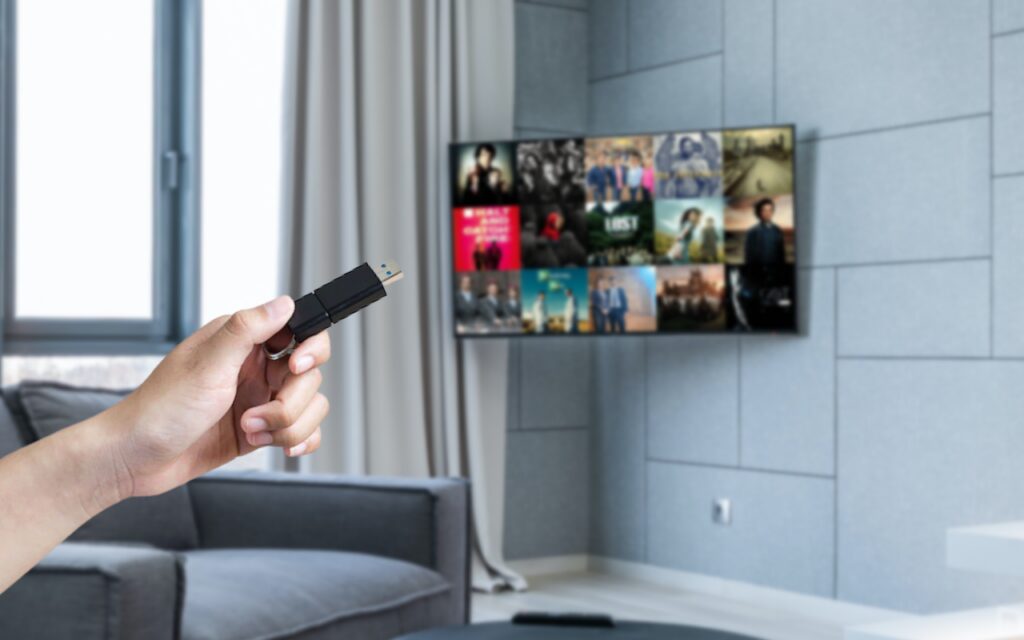
Modern TVs nowadays offer support for external USB sticks that allow you to play the content on the screen. If you have such a TV, you can use a USB stick to record your favorite TV show on it and watch it later.
All you need to do is connect the stick to your TV, check if the PVR function works properly, and start recording. USB sticks are among the most practical tools for recording a live television program without the need for a DVR or a screen recording device.
However, it does not come without limitations since you can record only as much as your stick offers memory, and it is likely that you will not be able to record high-resolution content.
2. Media Portal
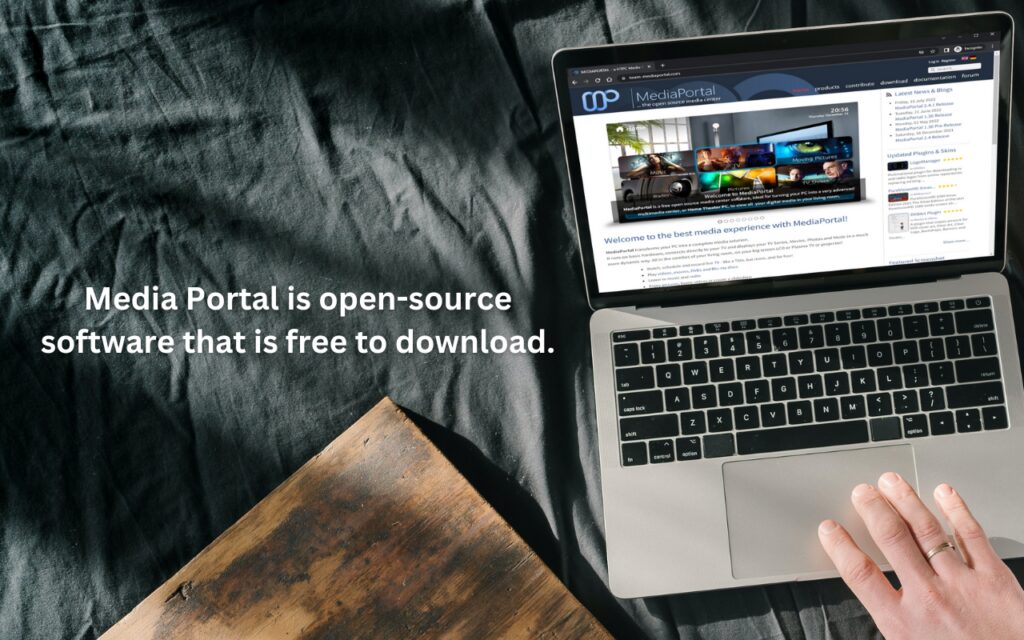
Media Portal is open-source software that is free to download. It allows you to connect a PC and TV and displays the content from the television easily. More importantly, it is a straightforward way to watch and record live TV and allows you to apply the remote function to control the HTPC.
To record shows using this method, you will need to download the Media Portal tool to your PC and, in the main interface, click on the TV. Afterward, just simply click the record button. You can also find the schedule recording feature to start recording automatically when your favorite show broadcasts.
3. Windows Media Player

You certainly heard of Windows Media Player, which is a software that launched and got first introduced with Windows XP. It allows you to play slideshows, videos, and music from your local hard drive, but it can also be used for recording content from the TV.
Since Microsoft removed Windows Media Player from Windows 10, do not bother with this method if you are using this operating system. However, if you use Windows 8 or older, you can try recording the TV with this player.
You can start recording by following the next steps. Open Windows Media Player on your PC, click Guide, and you will be able to see your TV menu with three options – TV names, categories, and times. Pick the show you want to record and press Enter.
Afterward, select the Record button to start recording, and stop it by pressing the Do Not Record button. When you want to save, click Record Series.
4. NextPVR

The NextPVR is a cross-platform video recorder that is supported by Linux, Windows, Docker, and many more. It is an easy and fast way to record your TV shows hassle-free. The NextPVR is packed with interesting features such as web scheduling, series recordings, Kodi integration, etc.
In addition, it offers a straightforward interface that is easy to comprehend even by people without special knowledge about technology. To start recording, you will need to download and launch NextPVR on your computer, open settings, and click the recording tab on the left side of your screen.
At the top of the screen, you will have to click on Man-REC, and it will allow you access to options such as “Record Once,” “Record Daily,” “Record Weekly,” and other similar options.
In the Manual Recording, you will be able to set up configuration options such as channel, name, date, start time, end time, pre and post-padding, and many more.
5. Wondershare UniConverter
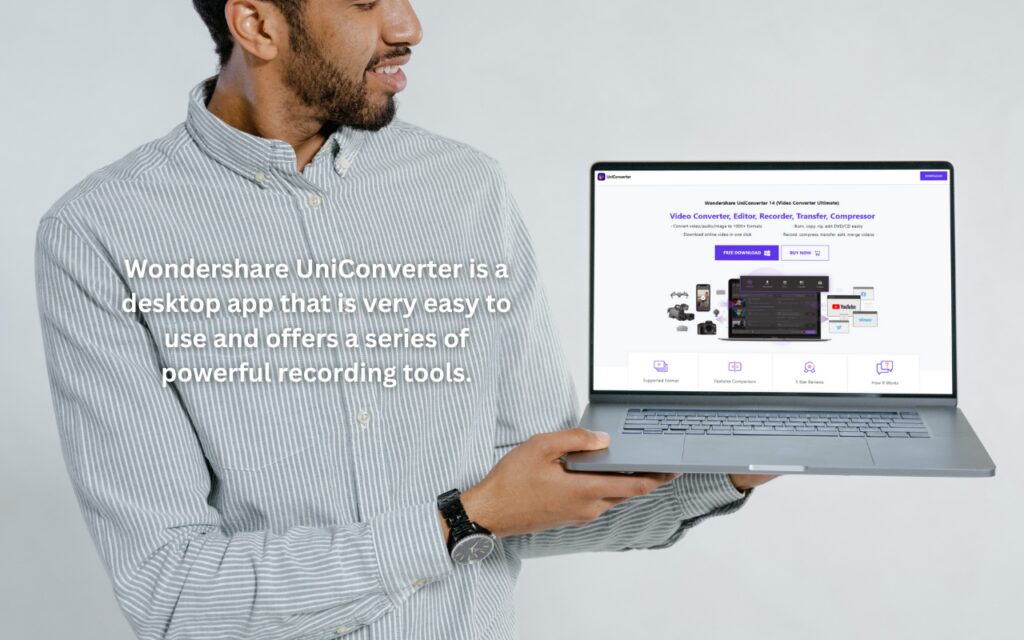
Wondershare UniConverter is a desktop app that is very easy to use and offers a series of powerful recording tools that will allow you to record your favorite TV shows effortlessly.
It provides many cool features that, apart from TV recording, allow you to capture desktop screens and add voice narrations, PIP effects, drawings, text, and many more.
You will have to install and launch the software, then click on the Screen Recording tab. This will open the screen where you should select the Recording Mode function.
There are multiple options that allow you to set up aspect ratio and select your recording preferences that are super-easy to control.
6. Third-Party Tools
You can find various third-party tools for recording online nowadays, and most of them are free to download from multiple websites. You can opt for apps such as Movavi Screen Recorder, Tweak Shot, or EaseUS RecExperts.
All of these tools are very easy to use, so which one you will pick entirely depends on your personal preferences. For this example, we will take Tweak Shot.
Download this software to your PC, install it, and launch it. You will need to right-click the Big Eye icon from the main menu and choose Capture Video from the drop-down menu.
You will get options to customize your video’s frame rate and quality in the TweakShot Capture menu, which is fairly easy to navigate. Do not forget to check the Record Audio box, play the Video and press the record button, and you are all set.
If you want to get the best possible performance out of this software, you will require a minimum of 2 GB of free space and a solid-state drive which will allow for everything to go smoothly.
FAQs
What equipment do I need to start recording without a DVR?
Depending on the method, you might need a computer, specific software, or an external recording device like a USB TV tuner.
How reliable are non-DVR recording methods?
While many methods are reliable, it’s essential to choose reputable software or devices and regularly check for updates to ensure smooth operation.
Can I edit the TV shows I record without a DVR?
Yes, with the right software, you can edit, trim, or even enhance the recorded content.
Is there a limit to how many shows I can record?
The only limit is your storage capacity. Ensure you have ample storage, especially if you’re recording in high definition.
How do I play back the shows I’ve recorded?
Most recordings can be played back on media players on your computer or TV. Ensure the format is compatible or use conversion software if needed.
Are there monthly fees associated with non-DVR recording methods?
Some software solutions might have subscription fees, while others are one-time purchases. Always check the pricing details before committing.
The Bottom Line
Who knew there were so many ways to record TV shows without a DVR? I’ve shared my favorite methods with you, and I hope they make your TV-watching experience even better. Remember, technology is always evolving, and there’s always a workaround for those little challenges we face.
So, the next time you’re about to miss an episode, don’t sweat it. With these tricks up your sleeve, you’re all set to capture those TV moments without the need for a DVR.