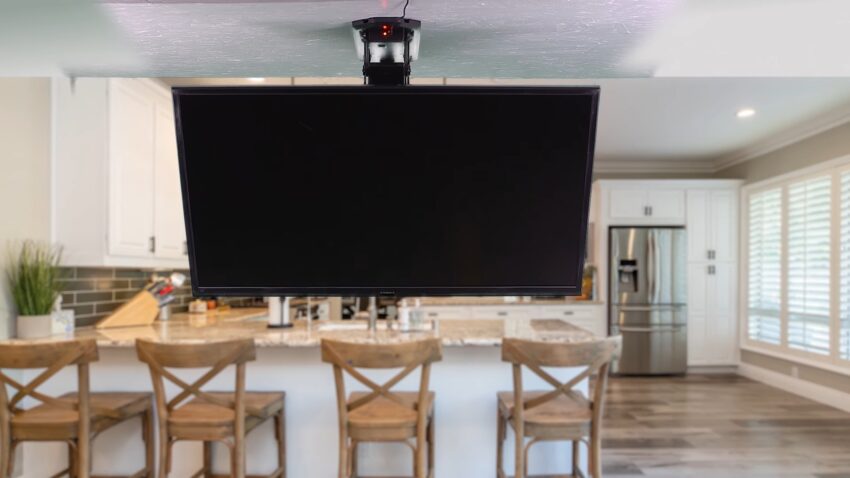
In modern homes, optimizing space and enhancing aesthetics is of paramount importance. One innovative way to achieve this is by mounting our television sets on the ceiling. Not only does this free up valuable floor space, but it also offers an unparalleled viewing experience.
When I first considered the idea of a ceiling mount, I was intrigued by its potential to transform my living space. It promised a cinematic experience right in the comfort of my home. But I also understood that a flawless installation was crucial.
A poorly installed mount could lead to numerous issues, from suboptimal viewing angles to potential damage. Now let us go through this process step-by-step to ensure that your ceiling mount installation is both easy and effective.
Tools and Materials Needed
Before embarking on any installation project, it’s essential to gather all the necessary tools and materials. Being prepared in advance can save a lot of time and prevent unnecessary interruptions. I’ve always found that having everything at arm’s reach streamlines the process and reduces the margin for error.
Tools
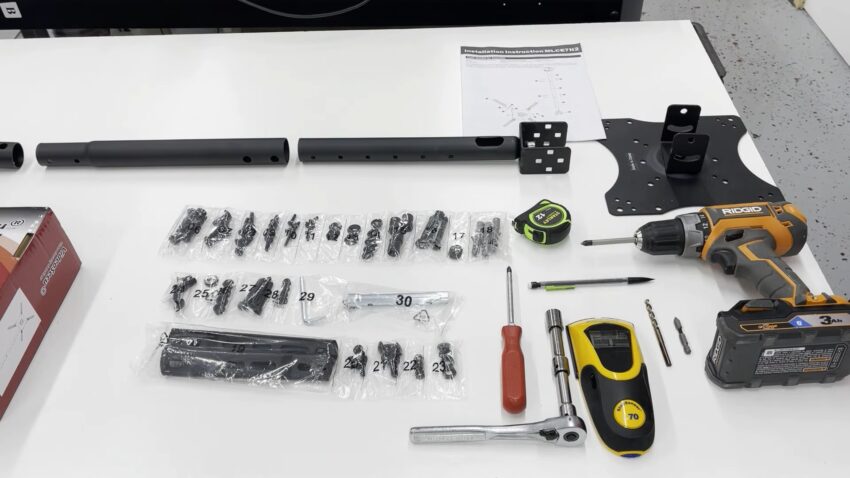
When I began my installation, I made sure to have the following tools on hand:
- Drill and drill bits: Essential for making precise holes in the ceiling.
- Stud finder: This tool helped me locate the ceiling joists, ensuring a secure installation.
- Level: To guarantee that the mount and, subsequently, the screen would be perfectly horizontal.
- Screwdrivers: Both flathead and Phillips were useful at different stages.
- Tape measure: Precision is key, and this tool ensured accurate measurements.
Materials
In addition to the tools, certain materials were indispensable:
- Ceiling mount kit: This typically includes the bracket, mounting plate, and other essential components.
- Screws and anchors: These ensure that the mount is securely affixed to the ceiling.
- Cable management tools: While optional, these tools, such as cable ties or sleeves, greatly enhanced the aesthetics by keeping cables organized and out of sight.
Pre-Installation Preparations

Before diving into the actual installation, I spent a considerable amount of time preparing. This preliminary phase is crucial as it sets the foundation for the entire process. Proper preparation ensures that the installation goes smoothly and that the end result is both functional and aesthetically pleasing.
Choosing the Right Location
Selecting the optimal location for the mount was perhaps the most critical decision I made. Here’s what zou should consider:
| Criteria | Consideration |
|---|---|
| Viewing Angle | Ensure visibility from all parts of the room. |
| Light Sources | Avoid glare; consider window and light placements. |
| Room Layout | Consider furniture and fixture positions. |
Checking Ceiling Strength
The last thing anyone wants is for their screen to come crashing down. Therefore, I took the following precautions:
- Using a stud finder: This helped me locate the joists in the ceiling, which are the strongest points for installation.
- Weight considerations: I ensured that the combined weight of the screen and the mount was well within the load-bearing capacity of the ceiling.
Mounting the Bracket to the Ceiling
Once the preliminary steps were completed, I moved on to the actual installation. This phase required utmost precision and attention to detail. After all, the bracket serves as the primary support for the screen, and its secure attachment to the ceiling is paramount.
Marking Drill Points
Before making any holes, I took the time to:
- Use the mount template: Most ceiling mount kits come with a template that indicates where to drill. This was invaluable in ensuring accuracy.
- Double-check measurements: I measured twice and drilled once, ensuring that the markings aligned perfectly with the ceiling joists.
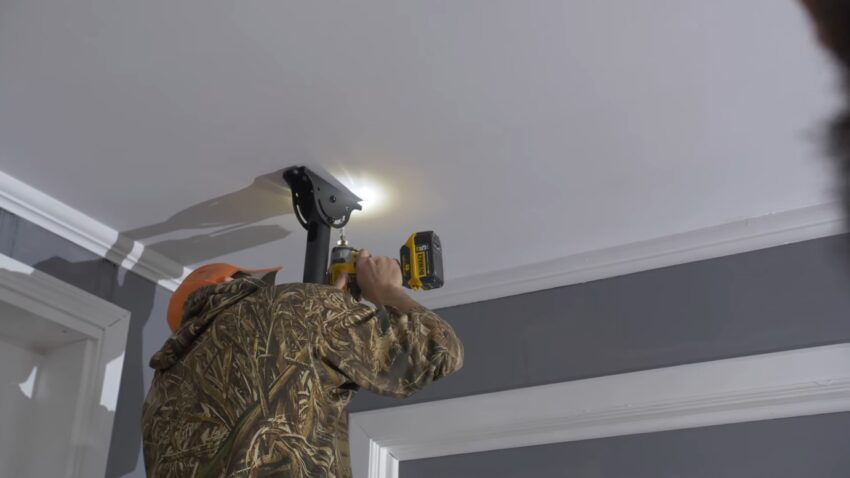
Drilling Pilot Holes
Drilling is a critical step, and you should pay special attention to it. Selecting the right drill bit size ensures that the screws fit snugly without damaging the ceiling. Also, make sure to drill straight, avoiding any angles that could compromise the mount’s stability.
Securing the Bracket
With the pilot holes ready, I proceeded to conduct two significant actions.
- Insert the anchors: These provided additional support, especially if the screws weren’t directly into a joist.
- Tighten the screws: I ensured they were secure but took care not to overtighten, which could damage the ceiling or the bracket.
Attaching the Screen to the Mount
With the bracket firmly in place, the next step was to attach the screen. This was a delicate process, as mishandling could lead to damage or suboptimal viewing angles.
Preparing the Screen
Before attaching it to the mount, I:
- Removed any stands or base supports: These are unnecessary and can interfere with the mounting process.
- Checked the mounting holes: Every screen has designated holes for mounting. I ensured they were clear of any obstructions.
Connecting the Mounting Plate to the Screen
This step was straightforward but crucial: Make sure the holes on the mounting plate matched those on the screen. By using the provided screws, you can attach the plate to the screen, ensuring a firm fit.
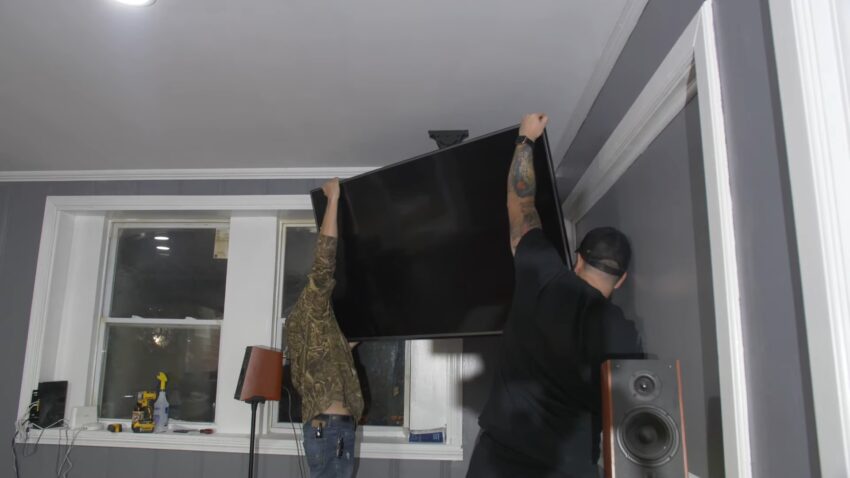
Lifting and Attaching the Screen to the Ceiling Bracket
Given the weight and delicacy of screens, this step required caution: Wit that in mind, I enlisted the help of a friend to ensure the screen was lifted safely and steadily. Once the screen was on the bracket, I made sure to engage any locks or safety mechanisms provided in the mount kit.
Cable Management and Final Adjustments
The installation was almost complete, but a few finishing touches were needed to ensure both functionality and aesthetics.
Cable Organization
A jumble of cables can detract from the beauty of a ceiling-mounted screen. Used cable ties help by bundling cables together, making them less conspicuous. On the other side, employed cable sleeve are great for concealing multiple cables, giving a neat appearance.
Adjusting Viewing Angle
With everything in place, I fine-tuned the viewing experience:
- Tilting and swiveling: I adjusted the screen to the desired angle, ensuring a comfortable view from all parts of the room.
- Locking in the position: Once satisfied, I used the mount’s mechanisms to lock the screen in place.
Testing Stability
The final step before enjoying my newly mounted screen was to:
- Check for wobbles: I gently pushed the screen to ensure there was no undue movement.
- Inspect all connections: A quick once-over ensured that all screws were tight and all components were secure.
Troubleshooting Common Issues
Despite our best efforts, sometimes we might encounter issues post-installation.
During my time with a ceiling-mounted screen, I’ve faced a few challenges, and I’d like to share solutions that worked for me. If the screen appears tilted or uneven you should chek the following aspects:
- Adjust the mount’s leveling screws
- Recheck installation points
Excessive Wobbling or Movement
Should the screen wobble more than expected, Over time, screws can loosen. A quick tightening can resolve the issue. Ensure that the mount is securely attached to the joist and not just the ceiling drywall.
Difficulty Adjusting Viewing Angle
If adjusting the screen’s angle becomes challenging:
- Lubricate swivel points: A little lubrication can make adjustments smoother.
- Inspect for obstructions: Sometimes, cables or other objects might hinder movement. Ensuring a clear path can alleviate this issue.
Cable Interference or Disconnections
In case of cable-related issues:
- Re-route cables: A clearer path can prevent tugging or disconnections.
- Opt for longer or flexible cables: These can provide more slack and reduce the chances of disconnections.
FAQ
How often should I check the stability of my ceiling-mounted TV?
It’s a good practice to inspect the mount’s stability every few months, especially in the initial stages after installation.
Are there specific ceiling types that are not suitable for TV mounts?
Sure, many mounts are versatile, but it’s crucial to ensure compatibility. For unique ceilings, like drop ceilings or plaster, it’s best to consult a professional or look for specialized mounting solutions.
What safety precautions should I take during installation?
Always turn off and unplug the TV, ensure the mount is securely attached to ceiling joists, and consider seeking assistance when lifting and attaching the TV to the mount.
What if my TV appears tilted or uneven after mounting?
Most ceiling mounts come with leveling adjustments. You can tweak these settings to ensure your TV is level. Always refer to the mount’s manual for guidance.
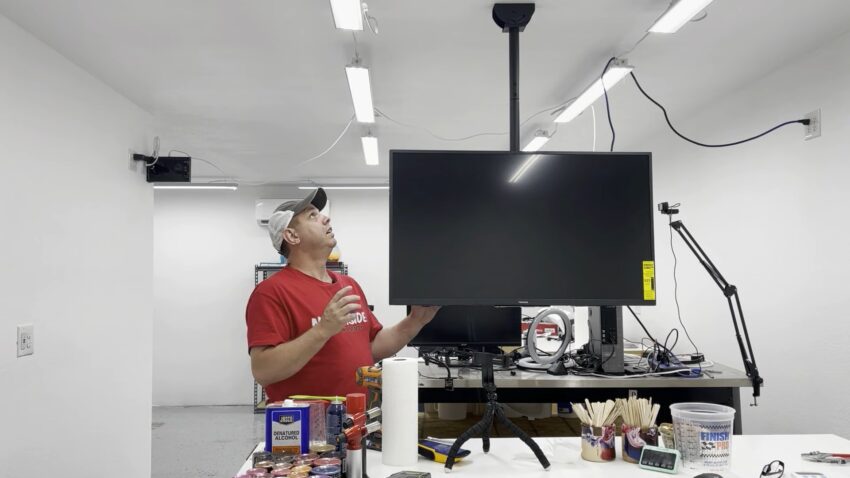
Summary
After completing the installation and making the necessary adjustments, I took a moment to step back and admire the transformation of my living space. The screen, suspended elegantly from the ceiling, not only optimized the room’s layout but also elevated the overall aesthetic.
Once you’ve mounted your TV, you might wonder about the best ways to decorate the space beneath it. Discover some creative ideas to enhance that area.
Installing a ceiling mount for a screen can be a rewarding DIY project. With the right tools, a methodical approach, and a dash of patience, anyone can transform their living space and enjoy a cinematic experience from the comfort of their home.